
Hummus is a popular Middle Eastern dip made from chickpeas. Whether you’re dipping fresh veggies, crunchy crackers, or warm pita, this heavenly dip is an absolute must-have. The best part? It’s incredibly easy to make at home with just a blender and a few basic ingredients. Simply add chickpeas, tahini, garlic, lemon, olive oil, salt, and cumin the blender. Blend it well, and your hummus is ready.
Make a batch today and store it in an airtight container in the refrigerator for whenever the craving strikes. Yum!
This article will take you through all the steps for making hummus in a blender and how to garnish and store your homemade hummus.
Preparation/Ingredients
Chickpeas

When making hummus, you have the option to use either canned or fresh chickpeas. For fresh or dried chickpeas, it’s recommended to cook them first and then let them cool down before adding them to the blender. Soaking the chickpeas before cooking can also reduce the cooking time. Remember to cool down the cooked chickpeas before blending, as warm chickpeas tend to absorb more liquid. This will result in a watered down hummus, which you do not want.
Note: If you are using canned chickpeas, do not pour out the liquid left in the can. The liquid will help make the hummus creamy.
Lemons: When making hummus, adding lemons can greatly enhance the flavor of chickpeas. Using lemon juice specifically can provide even better results.
Tahini: Tahini, a staple ingredient in hummus, gives the dip a nutty flavor and thick texture. However, if you don’t care for tahini, you can replace it with cashew butter or natural peanut butter. Keep in mind that the taste of the hummus will vary and may not be as rich when using nut butter.
Salt and Cumin: Cumin gives hummus a warm and fragrant spice and salt is needed to balance the flavors.
Garlic: Garlic is another ingredient that enhances the flavor of hummus, but it’s important to not add too much. You can start with one garlic clove or even roast the garlic before adding it to the blender.
The Process
Step 1: Begin the recipe by placing chickpeas, tahini, cumin, salt, garlic and a drizzle of olive oil in the blender. Once all the ingredients have been added, pour in some of the liquid from the chickpeas or lemon juice on top of the ingredients in the blender.

Step 2: Blend all the ingredients together, making sure that the chickpeas and other ingredients are fully mashed and start to become creamy. You may need to pause the blender and use a spoon or spatula to scrape down the sides of the blender to ensure that all the ingredients are well blended.
Step 3: Once the ingredients are thoroughly blended, you can add in the liquid from the can of chickpeas or some water to achieve the desired consistency. Mix everything again and your homemade hummus is ready to be served.

Note:
You can remove the skins from the chickpeas if you wish. It will blend nicely either way, with or without the skin.
You can start by adding one garlic clove to the blender. Once the ingredients are well mixed, give it a taste. If you want your hummus to be more garlicky, you can add another garlic clove.
Garnish Options
You can garnish your homemade hummus in different ways.
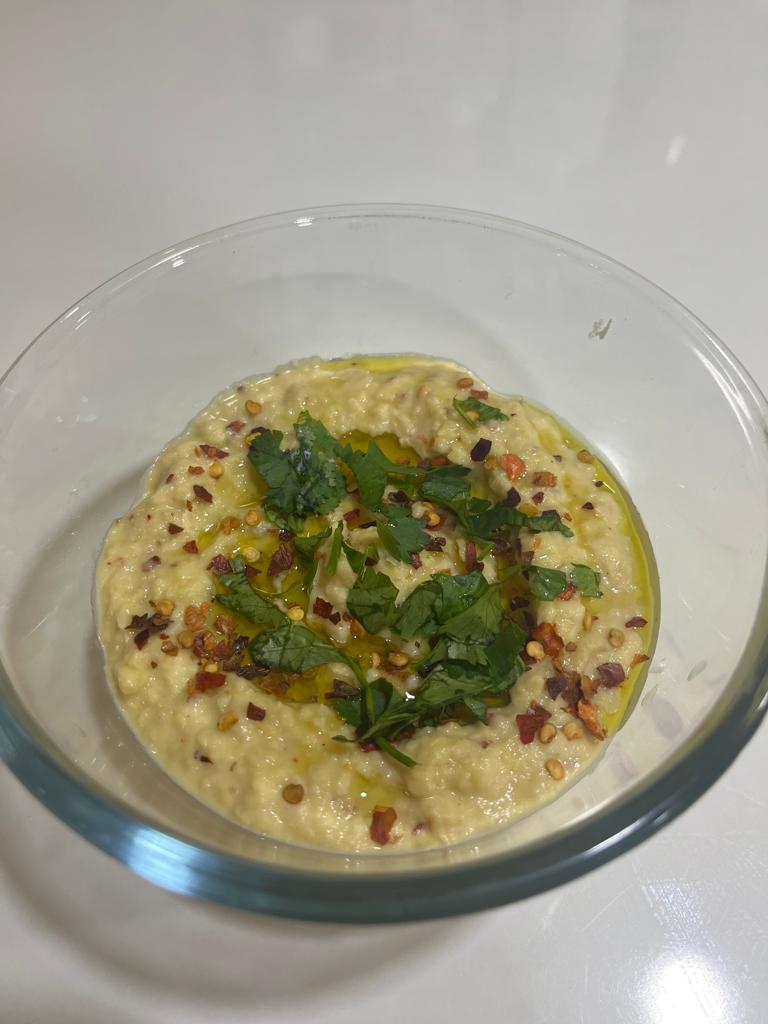
- You can drizzle some olive oil, paprika, and finely chopped parsley on the hummus. You could even use smoked paprika.
- You can garnish it with cilantro instead of parsley.
- If you like hot peppers, you can dice them up and use them as a garnish.
- If you want your hummus a little spicy, you can garnish it with hot sauce or chili flakes.
- You can use cumin, sesame seeds, pine nuts, or chickpeas as a garnish as well.
Ways to Enjoy Hummus
You can also use it as a sandwich spread, or as a side dish with your favorite vegetables, crackers or chips. You could even use it as a salad dressing or a marinade. The possibilities are endless.
Here are a few ways you can enjoy hummus:
- You can spread your hummus on a wrap, tortilla, or sandwich. Once you spread the hummus, you can layer it with vegetables such as tomatoes or cucumbers. You can even try and add avocado.
- If you are eating vegetables such as carrots, celery, or cucumbers, you can dip the vegetable in the hummus. You can even dip your crackers or flatbread in the hummus.
- You can make a rice bowl with hummus. You can add hummus to your rice and top it with meat, such as baked chicken or vegetables.
How to Store Your Homemade Hummus
The best part of making hummus at home is that you can store large quantities in the fridge for use at a later date.
There are two ways of storing hummus:
- If you want to keep your hummus for around a week, pack it in an airtight container and put it in the fridge. Remove it from the fridge and it’s ready to eat.
- If you want to store your hummus for a longer duration (Example: 3-4 months), pack it in an airtight container and place it in the freezer. You will want to store them in small quantities. When you need hummus, you can take it out one box at a time.
Note: Instead of containers, you can use Ziplock bags as well. Ensure that you seal them properly.
Final Words
Making your own hummus allows you to control the ingredients and adjust the flavors to your liking. You can make it as spicy or as garlicky as you want, and add different herbs and spices to change up the flavor. Homemade hummus is also a great option for those following a vegan or gluten-free diet. You can enjoy it as a dip, spread, or topping, and it’s also great as a sandwich or wrap filling. Overall, making your own hummus is a great way to add a delicious and healthy option to your meal routine.
As always, thanks for reading and be sure to keep your kitchen Hot and Salty!